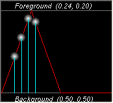
Artist Help:Effects Yoke
First, load the 'EXAMPLE.WSP' workspace supplied with Artist. The third fixture group (Moving Yoke Fixtures) contains 4 x yoke profile scans. Display this group in the Fixture view. If you have Wysiwyg you can also use the 'EXAMPLE.WYG' plot to view the effects.
Try the example Cues[edit]
To view the cues set the Fixture View to display the Moving Yoke Fixtures, open the Group Properties and check the Display All Parameters. You can now see all of the fixture's parameters.
Open the Operator window and select Moving Yoke Fixture (Cue list 4) which contains cues pertaining to the moving yoke devices.
Now try each of the cues in turn.
Try the Macros[edit]
Deactivate any running cues and open the Effect tab in the Fixture Control window. Now you can try the effects yourself.
If you are using Wysiwyg to visualise the effects you will need to activate all the fixtures and click Fixture Presets on the Fixture tool bar to set all the fixture to open white. This will also set the yokes to a centre position. Set Yoke as the active parameter and click on Zero active parameter on the Fixture tool bar to set the yokes to a zero position. You are now ready to try the macro effects.
You are now ready to try the macro effects.
- Activate the Yoke parameter from the Parameter List.
- Select the Macros tab
- Now try each of the Linear Macros in turn while watching the results in the Fixture View.
Each of these macros is specifically designed for fixtures arranged in one dimension.
Making Changes[edit]
The effect generated is added to the position set in the parameter window. You can use the joy pad in the effect window to adjust the relative positions of the fixtures in the group. Remember that the nature of the yoke movement means the adjusting the position may change the shape of the effect.
These macro you have just tried simply set the Effect properties in the Properties tab to some predefined values. You can, of coarse, alter these to your requirements.
Select the Swinger macro in the Linear column, then click on the Properties tab.

